
Almost all plain economical scrapbooking flowers are made from mulberry paper.
Green Tara's newest white petals are especially thick which makes it easy to
create these flowers:


They look like pretty fancy flowers but all I used was 4 layers of Green Tara white petals (2 of each style shown below) and a decorative centre. You can use other styles than I chose but you'll want the flower to be a big size (at least 2 inches/5 cm) with wide petals. This won't work very well with daisy style flowers.
You will need:
- 4 mulberry flowers layers
- a Q-tip
- warm water
- firm toothbrush
- decorative centre
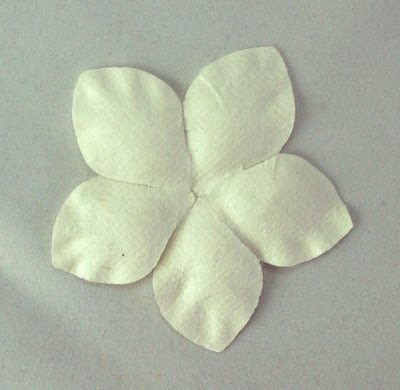
Bottom layers (2 of these) Green Tara Code PFLP01:


Top layers (2 of these) Green Tara Code PFLP143:

Decorative center (your can use anything to match your project style!) Green Tara Code XF5034lv:


Instructions:
Step 1: Working with one flower at a time, take a wet Q-tip and "paint" the only the very edge of each petal with warm water. Do this to the 2 bottom layers and 1 of the top layers.
Step 2: With dry fingers, pull off the wet edge of the petals in 3-4 small tugs of each petal. Let dry without damaging the fuzzy edge you just created. HINT: I left one of the top layers plain (didn't fuzz the edge) to have contrast since my flower is all white.
Step 3: Once the 3 fuzzy layers are dry. Brush them with the firm toothbrush bristles to fuzz them even more. Stroke the bristles from the middle of the flower outwards.
Step 4: Glue your layers together and add the decorative center.


That's it! So simple yet so elegant and expensive looking. Another alternative is using your flower punches/dies to make your own petal layers too. Green Tara sells all kinds of beautiful mulberry paper in any color imaginable.
Thanks for visiting the blog today!
Vicky

They look like pretty fancy flowers but all I used was 4 layers of Green Tara white petals (2 of each style shown below) and a decorative centre. You can use other styles than I chose but you'll want the flower to be a big size (at least 2 inches/5 cm) with wide petals. This won't work very well with daisy style flowers.
You will need:
- 4 mulberry flowers layers
- a Q-tip
- warm water
- firm toothbrush
- decorative centre
Bottom layers (2 of these) Green Tara Code PFLP01:

Top layers (2 of these) Green Tara Code PFLP143:

Decorative center (your can use anything to match your project style!) Green Tara Code XF5034lv:

Instructions:
Step 1: Working with one flower at a time, take a wet Q-tip and "paint" the only the very edge of each petal with warm water. Do this to the 2 bottom layers and 1 of the top layers.
Step 2: With dry fingers, pull off the wet edge of the petals in 3-4 small tugs of each petal. Let dry without damaging the fuzzy edge you just created. HINT: I left one of the top layers plain (didn't fuzz the edge) to have contrast since my flower is all white.
Step 3: Once the 3 fuzzy layers are dry. Brush them with the firm toothbrush bristles to fuzz them even more. Stroke the bristles from the middle of the flower outwards.
Step 4: Glue your layers together and add the decorative center.

That's it! So simple yet so elegant and expensive looking. Another alternative is using your flower punches/dies to make your own petal layers too. Green Tara sells all kinds of beautiful mulberry paper in any color imaginable.
Thanks for visiting the blog today!
Vicky
Great tutorial Vicky. Thanks for sharing. Di xo
ReplyDeleteThanks Vicky - can't wait to try it
ReplyDeleteGreat idea !!! love the toothbrush "tip"
ReplyDeleteSo elegant and easy thanks for the tips, will have to get my hands on some of these now
ReplyDelete